



Dentist Jefferson Park


For many kids, a trip to the dentist can feel like stepping into the great unknown—a strange chair, unfamiliar tools, and people poking around in their mouth? No wonder it can trigger anxiety. As a parent, watching your child struggle with fear at the dentist can be just as stressful for you.

But here’s the good news: dental anxiety is common, manageable, and often preventable, especially with the right approach and a little patience. A positive experience early on can shape your child’s attitude toward dental visits for life. Here’s how to make that happen.

Why Are Kids Afraid of the Dentist?

Children fear the dentist for the same reasons adults do—but often with less context. Common triggers include:

  1. Fear of the unknown
  2. Sensory overload (sounds, smells, bright lights)
  3. Separation anxiety from parents
  4. Fear of pain or needles
  5. Negative stories from siblings or friends

The earlier you can introduce your child to the dentist—and the more consistently you go, the less frightening it becomes.

Start Early & Start Small

The best way to reduce dental anxiety is to make the dentist Jefferson Park feel familiar. Schedule your child’s first visit by their first birthday or when their first tooth appears. These early visits are usually short and gentle, focusing on helping your child feel safe and comfortable in the environment.

Think of it as a “meet and greet” with the dentist—no pressure, no poking, just smiles and maybe a high-five.

Pro Tips for Reducing Dental Anxiety in Children

1. Use Positive Language

Avoid words like “pain,” “shot,” or “drill.” Instead, talk about the dentist in a fun, light way:

“We’re going to the tooth doctor to get your smile checked!”

“The dentist helps keep your teeth shiny and strong!”

Let the dental team explain procedures in age-appropriate ways—they’re trained to do it without creating fear.

2. Read Books or Watch Videos About the Dentist

There are many great children’s books and cartoons that explain what happens at the dentist in a friendly, playful way. These stories help kids see the dentist as a normal and even fun experience.

3. Play “Dentist” at Home

Pretend to be the dentist at home by having your child open wide while you “check” their teeth with a toothbrush. Then switch roles and let them be the dentist for a stuffed animal or doll. This kind of imaginative play can make the real thing feel less intimidating.

4. Choose a Kid-Friendly Dentist

A pediatric dentist or family dentist who regularly sees children will know exactly how to handle anxiety. Look for an office that offers a calm, welcoming atmosphere—with things like toys, cartoons, and staff who speak kid language.

5. Stay Calm & Present

Your child takes emotional cues from you. If you’re nervous, they’ll pick up on it. Smile, speak gently, and avoid showing any signs of stress. During the visit, stay close, offer encouragement, and use simple phrases like “You’re doing great!” or “Almost done!”

6. Use Rewards Thoughtfully

Instead of bribing your child (“If you go to the dentist, I’ll get you ice cream”), try using positive reinforcement after the visit. “You were so brave—let’s pick a fun sticker/book/toy!” This makes bravery the focus, not the reward.

What If the Visit Doesn’t Go Perfectly?

That’s okay! Some children will cry, fuss, or resist and that’s normal. A good dentist understands this and will never force or shame a child. Sometimes it takes a few visits before your child feels fully comfortable. Be patient, and remember: consistency is key.

Dental anxiety in children is common, but it doesn’t have to define their experience. With early exposure, a positive attitude, and a compassionate dentist, your child can grow up feeling confident, safe, and even excited about taking care of their teeth. Start small, stay patient, and celebrate every little win along the way.
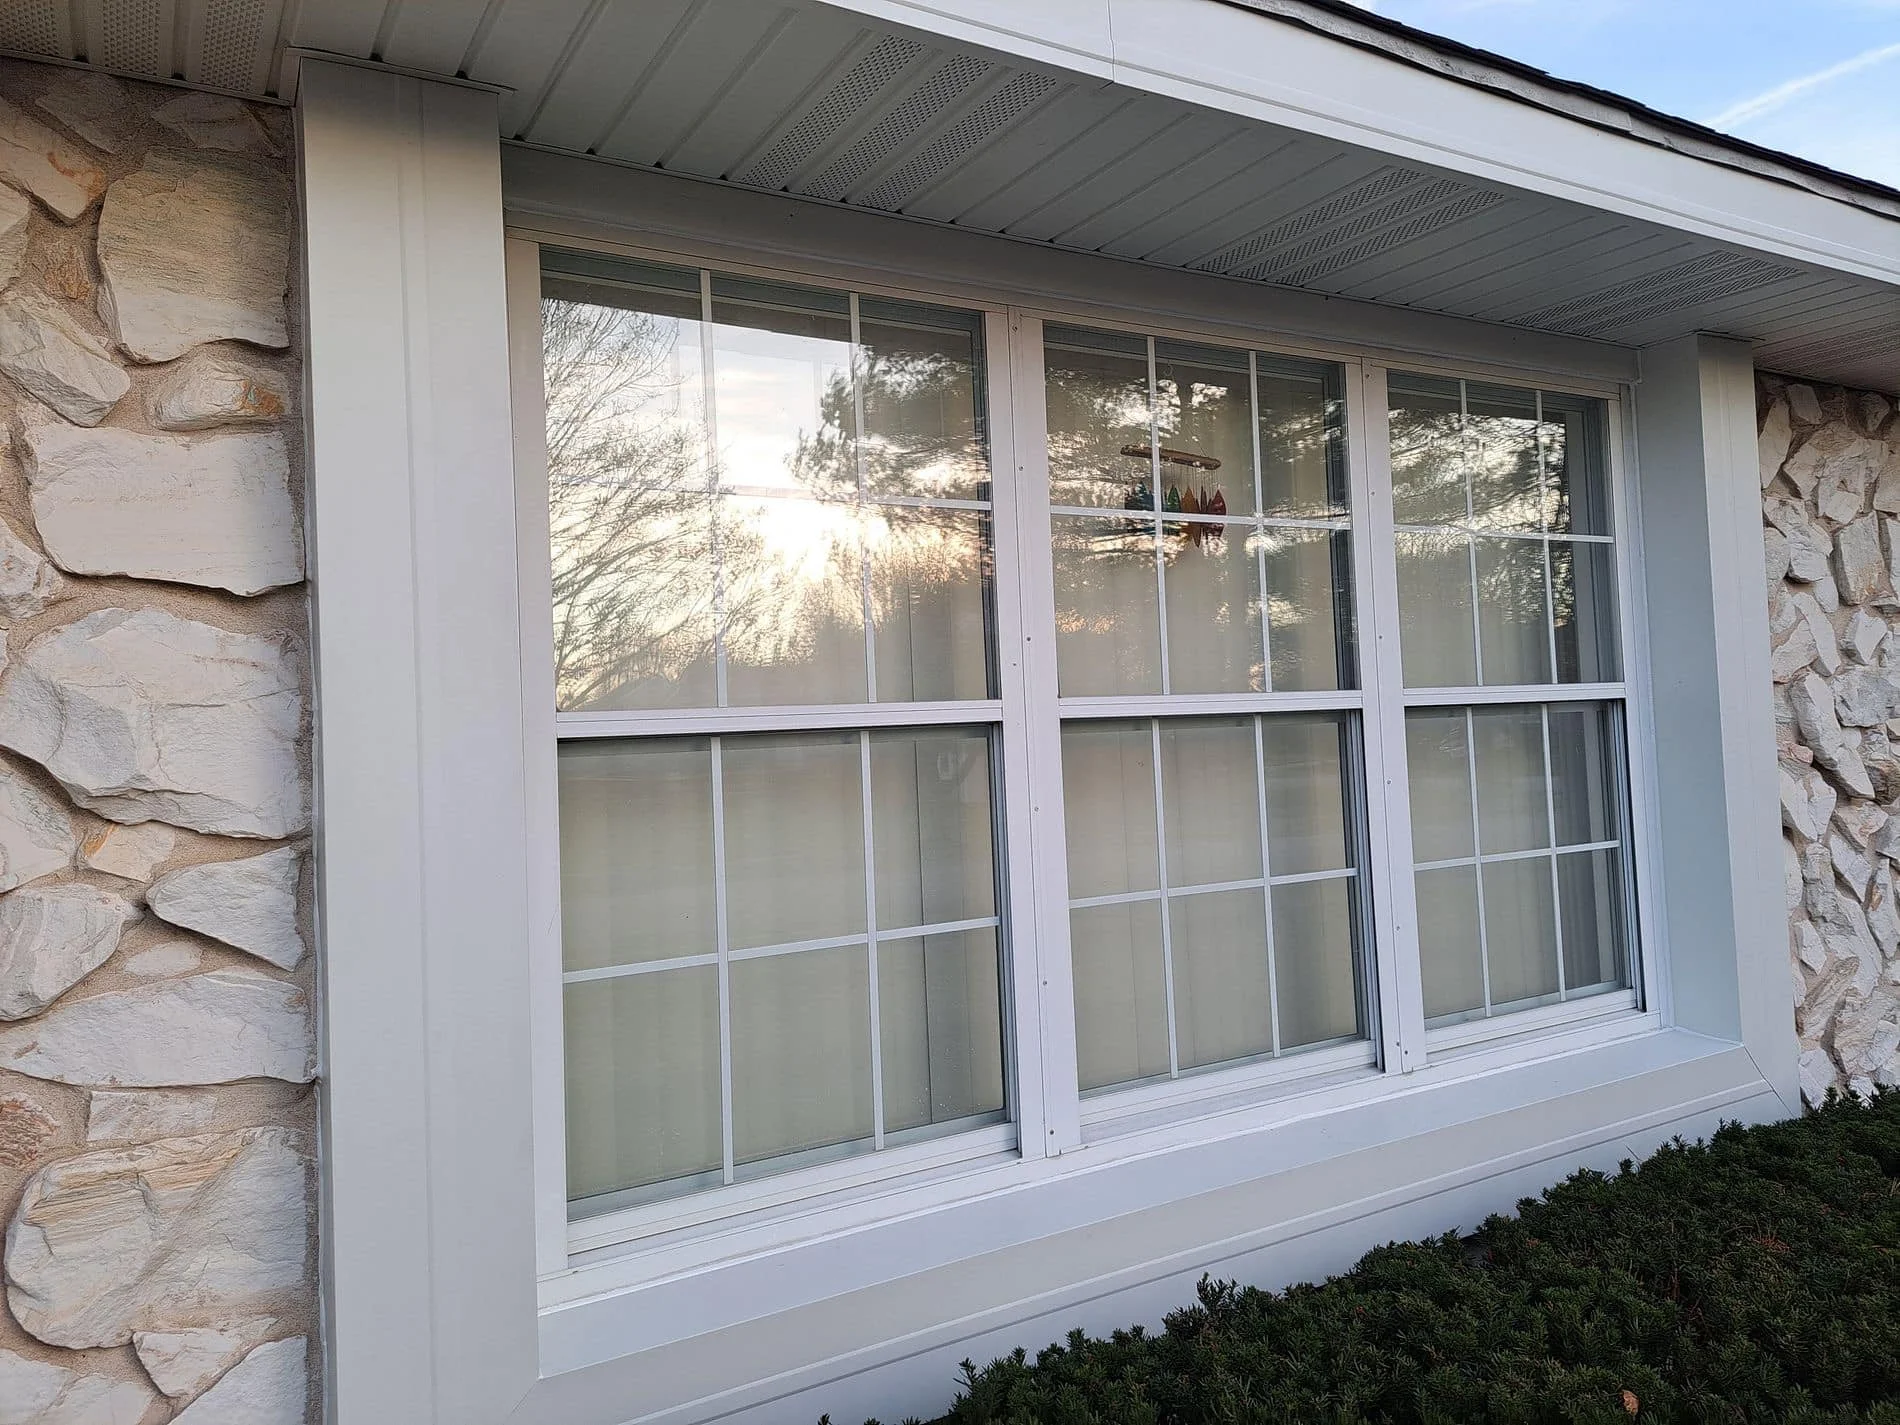
Window replacement near Glenview


Thinking about new windows? Whether you’re facing chilly drafts or summer heat waves, it’s a common question: When is the best time to schedule a window replacement near Glenview—and should you do all your windows at once?

While many homeowners assume that spring and summer are the only seasons for window installation, the reality is more flexible—and smarter timing can even save you money.

When’s the Best Season for Window Replacement?

Spring and Summer

These are traditionally the most popular months for window installation near Glenview, and for good reason:

* Mild weather makes for faster work

* Less risk of weather-related delays

* Great time to upgrade before summer cooling bills hit

But since it’s peak season, demand for window installers is high—so you’ll often face longer lead times and higher prices.

Fall and Winter

Contrary to popular belief, winter is not off-limits for window replacement. In fact, colder months can be ideal:

* Quicker scheduling availability

* Potential off-season discounts

* Immediate relief from drafts and cold spots

Reputable installers use efficient methods that minimize indoor temperature loss, even during cold-weather installations.

Why Replacing All Windows at Once Is Easier—Any Time of Year

No matter the season, tackling all your windows in a single project can actually make the job quicker and more efficient. Here’s why:

1. One Setup, One Cleanup
The crew arrives, sets up once, and completes everything in one pass—no repeated site visits.

2. No Repeat Disruptions
Window replacement can be a bit messy (think dust and noise). Doing it all at once limits the disruption to your life.

3. Seasonal Comfort Gains
If your old windows are leaking air, replacing them all immediately improves indoor comfort, especially during extreme temps.

4. Scheduling Simplicity
Trying to schedule multiple mini-installations across different months? That’s a hassle. One full window installation means one date, one contract, and done.

How Timing Can Save You Money

Window companies often run seasonal promotions, especially in fall and winter when demand dips. If you’re replacing all your windows at once, you’re also more likely to receive:

* Bulk pricing discounts

* Manufacturer rebates

* Lower per-window labor costs

It’s a win-win: better value and a faster return on your investment.

What If You Can’t Do Them All Now?

Not everyone can commit to a full-house window replacement right away—and that’s okay. Just prioritize:

* The draftiest or most damaged windows

* Sun-facing windows that overheat rooms

* High-traffic areas like living rooms or kitchens

Then make a plan for completing the rest in phases.

Do It Once, Enjoy It Longer

No matter the season, replacing all your windows at once can streamline your project, boost your home’s efficiency, and lock in the best deal. Don’t let the calendar hold you back—modern window installation techniques mean your comfort and energy savings don’t have to wait.

Tuckpointing near me Winnetka


Brick buildings are known for durability—but the secret behind their long life is proper maintenance. Mortar plays a key role, and tuckpointing is the main technique used to restore and preserve it. If you want your brick home or building to last for generations, tuckpointing near me Winnetka is non-negotiable.

How Mortar Fails Over Time

  1. Wind and weather slowly wear it away
  2. Vibration and settling cause cracks
  3. Poor-quality or mismatched mortar from past repairs deteriorates faster

The Benefits of Tuckpointing

  1. Reinforces the structural integrity of walls
  2. Prevents water from seeping behind bricks
  3. Maintains visual consistency in historic buildings
  4. Extends the life of both the bricks and the overall structure

When to Call a Tuckpointing Expert

If it’s been more than 20 years since your last tuckpointing (or ever), it’s worth scheduling an inspection. Catching failing mortar early keeps your home safe, secure, and beautiful—and saves thousands in avoidable damage.

Roofing Company near me Lombard


Many homeowners assume that if they spot a small leak in their roof, they can simply patch it up, and the problem will be solved. While a patch may provide a temporary fix, it’s often not the best long-term solution.

At our roofing company near me Lombard, we’ve seen countless cases where small leaks turned into major problems because they weren’t addressed properly. Here’s why simply patching a leak isn’t always enough.

Why a Patch Might Not Be Sufficient1. Leaks Can Indicate Deeper Issues

A visible leak often suggests hidden water damage underneath the shingles, in the underlayment, or even in the wooden decking. Simply sealing a leak without addressing the root cause could lead to:

  1. Structural damage
  2. Mold growth
  3. Rotted roof decking

2. Flashing and Seals Might Be Compromised

Leaks often form around vulnerable areas such as:

  1. Chimneys
  2. Skylights
  3. Roof vents
  4. Valleys where two slopes meet

In many cases, the issue is not just a crack in the shingles but damaged flashing or improperly sealed joints. A patch won’t fix flashing failure.

3. Water Can Travel

Roof leaks are tricky because water doesn’t always drip straight down. It can travel along beams, insulation, and ceilings, making it hard to find the true source of the problem. Patching a visible wet spot might not stop the leak if water is entering from a different area.

When Is a Patch Acceptable?

A patch can be a temporary solution in cases like:

  1. A few missing shingles after a storm
  2. A small puncture from debris
  3. A minor issue detected early

However, even in these cases, it’s wise to schedule a professional inspection to ensure no hidden damage exists.

How to Properly Fix a Leaking Roof

  1. Identify the true source of the leak (which may be away from where water is visible).
  2. Replace damaged shingles, flashing, or underlayment as needed.
  3. Check for signs of mold or water damage inside the attic.
  4. Ensure proper ventilation to prevent moisture buildup.

While a quick patch may seem convenient, it won’t solve underlying roofing issues. If you have a leak, trust our roofing company for a comprehensive inspection and lasting repair.

Roofing company near me Mount Prospect


Thinking about selling your home or just want to improve its look? A roof replacement by a professional roofing company near me Mount Prospect can add value and curb appeal.

1. Increased Home Value

  1. A new roof recoups 60-70% of its cost in increased home value.
  2. Buyers are more likely to choose a home with a newer, durable roof.

2. Enhanced Curb Appeal

  1. Modern roofing materials come in a variety of styles and colors to match your home’s exterior.
  2. A new roof makes a strong first impression on potential buyers.

3. Better Energy Efficiency

  1. Newer roofs help reduce cooling and heating costs, making homes more attractive to buyers.

If you’re looking to increase property value, a roofing company can guide you on the best options for your home.

Bathroom remodel near me in Highland Park


When planning a bathroom remodel near me in Highland Park, it’s important to focus on more than just style and aesthetics—functionality matters too. One often-overlooked aspect is ventilation, which is essential for maintaining air quality, reducing moisture buildup, and preventing mold growth. Poor ventilation can lead to long-term damage, so it’s crucial to get it right during renovations.

If you’re updating your bathroom, here are some effective ways to improve its ventilation and create a healthier space.

1. Upgrade to a High-Performance Exhaust Fan

A bathroom exhaust fan is key to removing excess humidity, but not all models offer the same level of efficiency. When selecting a fan, consider:

  1. Airflow Capacity (CFM Rating): Bathrooms under 100 square feet require at least 1 CFM per square foot for effective moisture removal.
  2. Noise Levels: Opt for a fan with a low sone rating (1.0 or less) for quieter operation.
  3. Automatic Humidity Detection: Some advanced models feature built-in sensors that activate the fan when humidity rises.

2. Use a Timer or Smart Switch

Many people turn off their exhaust fan too soon after showering, leaving lingering moisture in the air. Installing a timer switch allows the fan to run for an additional 15–30 minutes, ensuring proper ventilation. Alternatively, a smart humidity sensor switch can automatically detect moisture levels and activate the fan as needed.

3. Ensure Proper Duct Venting

An exhaust fan won’t be effective if it’s not vented correctly. Some older setups release moist air into the attic or another enclosed space, leading to structural issues. Instead, make sure your fan vents directly outside through the roof or an exterior wall to prevent moisture buildup.

4. Incorporate Natural Ventilation

If your remodel allows, adding a window or skylight can significantly improve airflow. A window that can be opened after showers helps expel humid air, while a vented skylight offers an alternative if wall space is limited.

5. Improve Airflow with a Vent Grille

Enhancing airflow between the bathroom and other areas of your home can also help with moisture control. Installing a vent grille in the door or wall allows air to circulate more freely, preventing humidity from becoming trapped inside.

6. Choose Moisture-Resistant Materials

Even with a strong ventilation system, bathrooms remain naturally humid environments. Using mold-resistant drywall (such as green board or cement board), water-resistant paint, and anti-microbial grout can help minimize mold and mildew growth over time.

7. Keep Your Ventilation System in Top Condition

Upgrading your ventilation is just the first step—regular maintenance is necessary to keep it working efficiently. Clean or replace the exhaust fan filter periodically, check for blockages in the ductwork, and ensure the exterior vent remains clear of obstructions.

A bathroom remodel is the ideal opportunity to enhance ventilation and create a more comfortable, long-lasting space. Whether you’re installing a better exhaust fan, introducing natural airflow, or improving air circulation, these upgrades will help prevent mold, eliminate excess moisture, and maintain a fresh environment.

By prioritizing proper ventilation, you’ll protect your investment and enjoy a cleaner, healthier bathroom for years to come.

Foundation Repair Near Schaumburg

A strong foundation is essential for the safety and longevity of your home, but one of its greatest enemies is water intrusion. If not properly managed, excess moisture can lead to severe structural issues, costly repairs, and even health hazards like mold and mildew. This is why basement waterproofing is a key component of maintaining a secure home. If you’re considering foundation repair near Schaumburg, understanding the role of waterproofing can help you prevent future damage and unnecessary expenses.

How Water Can Damage Your Foundation

When water seeps into the ground around your home, it can create a variety of foundation problems, including:

  1. Soil Erosion: Water can wash away the soil supporting your foundation, causing settling and structural instability.
  2. Hydrostatic Pressure: Excess moisture increases pressure against basement walls, leading to cracks, leaks, and potential structural failure.
  3. Mold and Mildew Growth: A damp basement promotes mold growth, which can negatively impact indoor air quality and cause health issues.
  4. Cracks and Leaks: Water can seep into small foundation cracks and expand when frozen, worsening the damage over time.

The Benefits of Basement Waterproofing

Waterproofing your basement does more than just keep it dry—it provides long-term protection for your entire home:

  1. Prevents Structural Damage: Keeping moisture away from your foundation minimizes the risk of cracks, shifting, and expensive repairs.
  2. Improves Indoor Air Quality: A dry basement helps prevent mold growth, creating a healthier living environment.
  3. Increases Property Value: Homes with a well-maintained, waterproofed foundation are more appealing to potential buyers.
  4. Enhances Energy Efficiency: Moisture can make your HVAC system work harder, increasing energy costs. A dry basement helps regulate indoor temperatures more efficiently.
  5. Protects Your Belongings: If your basement is used for storage or as a living space, waterproofing helps safeguard your valuables from water damage.

Effective Waterproofing Solutions

There are several methods available to keep your basement dry and maintain a strong foundation:

  1. Interior Sealants: These help seal small cracks and prevent minor leaks but are not a long-term solution.
  2. Exterior Waterproofing: Applying waterproof membranes and installing drainage systems around your home prevents water from reaching the foundation.
  3. French Drains and Sump Pumps: These systems redirect water away from your basement, helping prevent flooding.
  4. Gutter and Downspout Maintenance: Properly directing rainwater away from your home reduces the risk of water pooling near the foundation.
  5. Landscape Grading: Adjusting the slope around your home helps prevent water accumulation near the foundation.

Finding the Right Experts for Foundation Repair

If you notice warning signs such as foundation cracks, uneven floors, or moisture in your basement, it’s important to consult a professional. A skilled foundation repair specialist can evaluate the situation, recommend the best waterproofing solutions, and prevent small problems from becoming major structural issues.

Basement waterproofing plays a crucial role in maintaining the integrity of your foundation. Taking proactive steps to prevent water damage will protect your home, improve indoor air quality, and help you avoid costly repairs. If you’re in need of foundation repair, working with experts who specialize in waterproofing and structural stability will ensure a secure foundation and a safer home for years to come.

Window replacement near me in Arlington Heights


When it comes to window replacement near me in Arlington Heights, homeowners often face a crucial decision: Should they attempt a DIY installation, or is it better to hire a professional? While both options have their advantages, they also come with risks. Understanding these factors can help you make an informed choice that suits your budget, skills, and long-term home improvement goals.

DIY Window Replacement: The Pros and Cons

Many homeowners consider DIY window replacement to save money or to take pride in completing a home project on their own. But is it really the right choice? Let’s look at the advantages and potential pitfalls.

Pros of DIY Window Installation

✅ Cost Savings – The most significant benefit of replacing windows yourself is avoiding labor costs. Professional installation can be expensive, so handling it solo can lead to substantial savings.

✅ Sense of Accomplishment – If you’re handy and enjoy working on home improvement projects, installing your own windows can be rewarding.

✅ Flexible Scheduling – You can work at your own pace without having to coordinate with a contractor’s availability.

✅ Customization Control – Doing it yourself means you can choose materials, techniques, and finishes without worrying about miscommunication with a contractor.

Cons of DIY Window Installation

❌ Risk of Mistakes – Window installation is more complicated than it appears. An improper fit, poor sealing, or incorrect installation can lead to drafts, energy loss, and potential water damage.

❌ Time-Consuming – Even experienced DIYers may take significantly longer than professionals, which can be frustrating if the weather is unpredictable.

❌ Lack of Professional Tools – Installing windows requires specialized tools, such as sealants, shims, and leveling devices. Renting or purchasing these can add unexpected costs.

❌ Warranty Issues – Many window manufacturers provide warranties only if the installation is done by a certified professional. DIY work could void these warranties.

Professional Window Replacement: The Pros and Cons

Hiring an experienced contractor ensures that your windows are installed correctly and efficiently. However, it does come at a cost.

Pros of Professional Window Installation

✅ Expertise & Precision – Trained installers have the experience to fit and seal windows properly, ensuring energy efficiency and longevity.

✅ Faster Installation – A team of professionals can typically replace multiple windows in a day, minimizing disruption to your home.

✅ Warranty Protection – Many window manufacturers require professional installation for warranty coverage, protecting you from defects or installation-related issues.

✅ Better Energy Efficiency – Proper installation ensures a tight seal, reducing drafts and improving insulation, which can lower energy bills.

✅ Code Compliance – Professionals are familiar with local building codes and safety regulations, ensuring your installation meets legal requirements.

Cons of Professional Window Installation

❌ Higher Costs – The biggest downside is the expense of labor. Professional installation can sometimes double the cost of a DIY project.

❌ Less Scheduling Flexibility – You’ll need to work around the contractor’s availability, which could delay your project if they’re booked out.

❌ Limited Control – While professionals follow best practices, some homeowners prefer the hands-on approach of DIY to ensure their exact specifications are met.

Which Option Is Right for You?

The best choice depends on your skill level, budget, and priorities. Here’s a quick guide to help you decide:

💡 Go DIY if:

  1. You have prior experience with carpentry or home renovation.
  2. You’re replacing a single, easily accessible window.
  3. You’re comfortable troubleshooting potential installation issues.

🔨 Hire a professional if:

  1. You’re replacing multiple windows.
  2. You want to maximize energy efficiency and durability.
  3. You’re unsure about handling tools, sealing, or code compliance.

Window replacement is a major investment in your home’s comfort, energy efficiency, and curb appeal. While DIY installation may seem cost-effective, mistakes can be costly in the long run. If you have experience with home improvement projects, replacing a window yourself may be feasible. However, for homeowners who want a stress-free, professional result, hiring an expert is the best way to ensure long-term performance and warranty protection.

Siding Contractors Near Me in Bartlett


Siding plays a crucial role in protecting your home and enhancing its curb appeal. However, errors made by inexperienced siding contractors or DIY installers can lead to long-term issues. Here’s a breakdown of common siding installation mistakes and how to prevent them.

1. Improper Surface Preparation

A well-prepared surface is essential for durable siding installation. Skipping this step can weaken the siding and shorten its lifespan.

Common Mistakes:

  1. Covering old or damaged materials.
  2. Overlooking mold or moisture beneath the surface.
  3. Failing to clean the area properly before installation.

How to Prevent It:

  1. Inspect the surface and repair any damage before starting.
  2. Clean thoroughly to ensure proper adhesion.
  3. Install a weather-resistant barrier to protect against moisture.

2. Incorrect Nailing Techniques

Proper nailing is critical for siding stability. Mistakes in nailing can cause warping, detachment, and aesthetic issues.

Common Mistakes:

  1. Driving nails too deeply, leading to distortion.
  2. Leaving nails loose, risking detachment.
  3. Using incorrect nails or improper spacing.

How to Prevent It:

  1. Use galvanized nails or those recommended by the manufacturer.
  2. Follow guidelines for nail placement and depth.
  3. Avoid overdriving nails to allow for necessary movement.

3. Ignoring Expansion and Contraction

Materials like vinyl siding expand and contract with temperature changes. Failing to accommodate this movement can result in buckling and cracks.

Common Mistakes:

  1. Installing panels too tightly.
  2. Not leaving gaps around windows, doors, or panel edges.
  3. Overlooking manufacturer guidelines for expansion gaps.

How to Prevent It:

  1. Leave appropriate gaps as recommended by the manufacturer.
  2. Follow proper spacing techniques for overlaps and cutouts.
  3. Rely on skilled siding contractors familiar with your chosen material.

4. Improper Flashing Installation

Flashing helps protect your home from water damage by directing water away from critical areas. Poor installation can lead to leaks and structural issues.

Common Mistakes:

  1. Skipping flashing in essential areas.
  2. Using substandard materials.
  3. Leaving gaps that allow water infiltration.

How to Prevent It:

  1. Always install flashing, even in areas where it seems unnecessary.
  2. Use high-quality materials and follow the manufacturer’s instructions.
  3. Test flashing for leaks before completing the project.

5. Misaligned Panels

Crooked or uneven siding panels can ruin your home’s appearance and reduce curb appeal.

Common Mistakes:

  1. Starting with an uneven base.
  2. Failing to check alignment during installation.
  3. Neglecting to use alignment tools.

How to Prevent It:

  1. Begin with a level base and recheck alignment regularly.
  2. Use tools like chalk lines or laser levels to maintain straight lines.
  3. Address alignment issues immediately during installation.

6. Skipping Maintenance

Even the best siding installation requires regular maintenance to keep it durable and visually appealing.

Common Mistakes:

  1. Neglecting routine cleaning and inspections.
  2. Ignoring small damages that worsen over time.
  3. Using harsh or improper cleaning methods.

How to Prevent It:

  1. Clean siding annually with mild soap and water.
  2. Repair damages as soon as they’re noticed.
  3. Follow manufacturer-recommended maintenance guidelines.

Avoiding these common mistakes is crucial to ensuring your siding performs well and maintains its aesthetic appeal. Whether you choose experienced siding contractors near me in Bartlett or handle the project yourself, proper installation and maintenance practices will protect your home and extend the life of your siding.

Window Replacement Near Me in Schaumburg | New Edge Window Replacement

Replacing your home’s windows is a significant investment that can enhance both its energy efficiency and curb appeal. If you’re searching for window replacement near me in Schaumburg, here’s a detailed guide to help you select a reliable and proficient service provider.

1. Local Experience: Choose window replacement services that have substantial experience in Schaumburg. Local providers are more familiar with the specific climate conditions and building codes in the area, ensuring that your new windows are suitable and compliant.

2. Wide Range of Products: Make sure that the providers of window replacement near me in Schaumburg offer a diverse selection of window types and materials. Whether you’re interested in vinyl, wood, fiberglass, or aluminum windows, or specific styles like double-hung, casement, or sliding windows, a reputable provider should have a broad catalog.

3. Quality of Materials: The performance and longevity of your new windows depend significantly on the quality of the materials used. High-quality windows not only last longer but also provide better insulation and noise reduction.

4. Installation Expertise: Proper installation is crucial to the functionality and lifespan of your windows. Look for services offering window replacement near me in Schaumburg that employ skilled and certified installers. Properly installed windows will provide better energy efficiency and are less likely to have issues over time.

5. Customer Reviews and Testimonials: Research the reputation of the window replacement services by reading customer reviews and asking for testimonials. Feedback from past customers can provide insights into the company’s reliability, workmanship, and customer service.

6. Licensing and Insurance: Verify that the window replacement services near me in Schaumburg are fully licensed and insured. This not only protects you against potential damages but also ensures that the company adheres to professional standards and local building codes.

7. Transparent Pricing and Detailed Estimates: Reputable window replacement companies will provide transparent pricing and detailed estimates. Make sure you get a clear breakdown of all costs, including materials, labor, and any additional fees. This transparency helps prevent unexpected costs and assists in budget planning.

8. Energy Efficiency Focus: If energy efficiency is a priority, look for window installers who specialize in energy-saving solutions and can offer products like double or triple-pane windows with low-E coatings.

9. Warranty and After-Sales Support: Inquire about the warranty offered on both the products and installation. Comprehensive warranties protect your investment and provide peace of mind. Also, check if the company offers after-sales support for any issues that might arise after installation.

Conclusion: Finding the right service for “window replacement near me in Schaumburg” involves considering the installer’s local experience, range of products, material quality, installation expertise, customer feedback, licensing and insurance status, pricing transparency, energy efficiency focus, and warranty offerings. By carefully evaluating these aspects, you can ensure that your window replacement project enhances both the comfort and curb appeal of your home.